Showing posts with label leather. Show all posts

Wednesday, 7 November 2012

DIY; Carpet Clutch


Sometimes the best inspiration comes from those around you. 

I've been in a home redecorating mood lately. Getting ready for winter making our place cozy and warm and well lit to compensate for time change.  This started with a good old fall cleaning and temporarily ended with the purchase of a new couch!  A new couch which then brought on a spree of re-arranging, re-furnishing, shelf building, lamp hanging and so on.  All of which has occupied the majority of my free time and creativity.

 Since then I've been in a bit of a creative lull, could be that all I want to do is hang out on my new couch but I've spent hours upon hours searching my favourite blogs (and new ones) for a good DIY idea and nothing has come to me.  Until this afternoon my lovely friend Sara stopped by for a quick pillow case making lesson/session with some great provence printed material.  But pillow cases really aren't the point here (though we did document the making of them which I was planning to post this evening) the point was that all I needed was a simple sewing project to get me back in the project mood.  

Materials needed:
Piece of Carpet 1ft x 1ft' 3 inches
Piece of material for lining
Old belt or inch wide strip of leather 2 inches longer then carpet
Jewellery making head pin, with decorative top 
Pins
Thread
Scissors
Needle Nose pliers
Speed-Sew glue, or other strong adhesive

Cut your lining about an inch wider then the piece of carpet your using. Fold under each side to make the lining just smaller then the carpet.

place the lining on top of the carpet with the nicer side of each facing outwards. Using your sewing machine stitch along each side of the material as show above. 
Fold the lined carpet as shown above, I left about 7 cm for the flap. 
 Stitch from A to B and from C to D, then turn your clutch carpet side out.


Pin then sew from A to B on either side of the clutch (shown above)


Lay out your strip of leather with the rough side facing up, leaving an extra 2 inches sticking out above the flap.


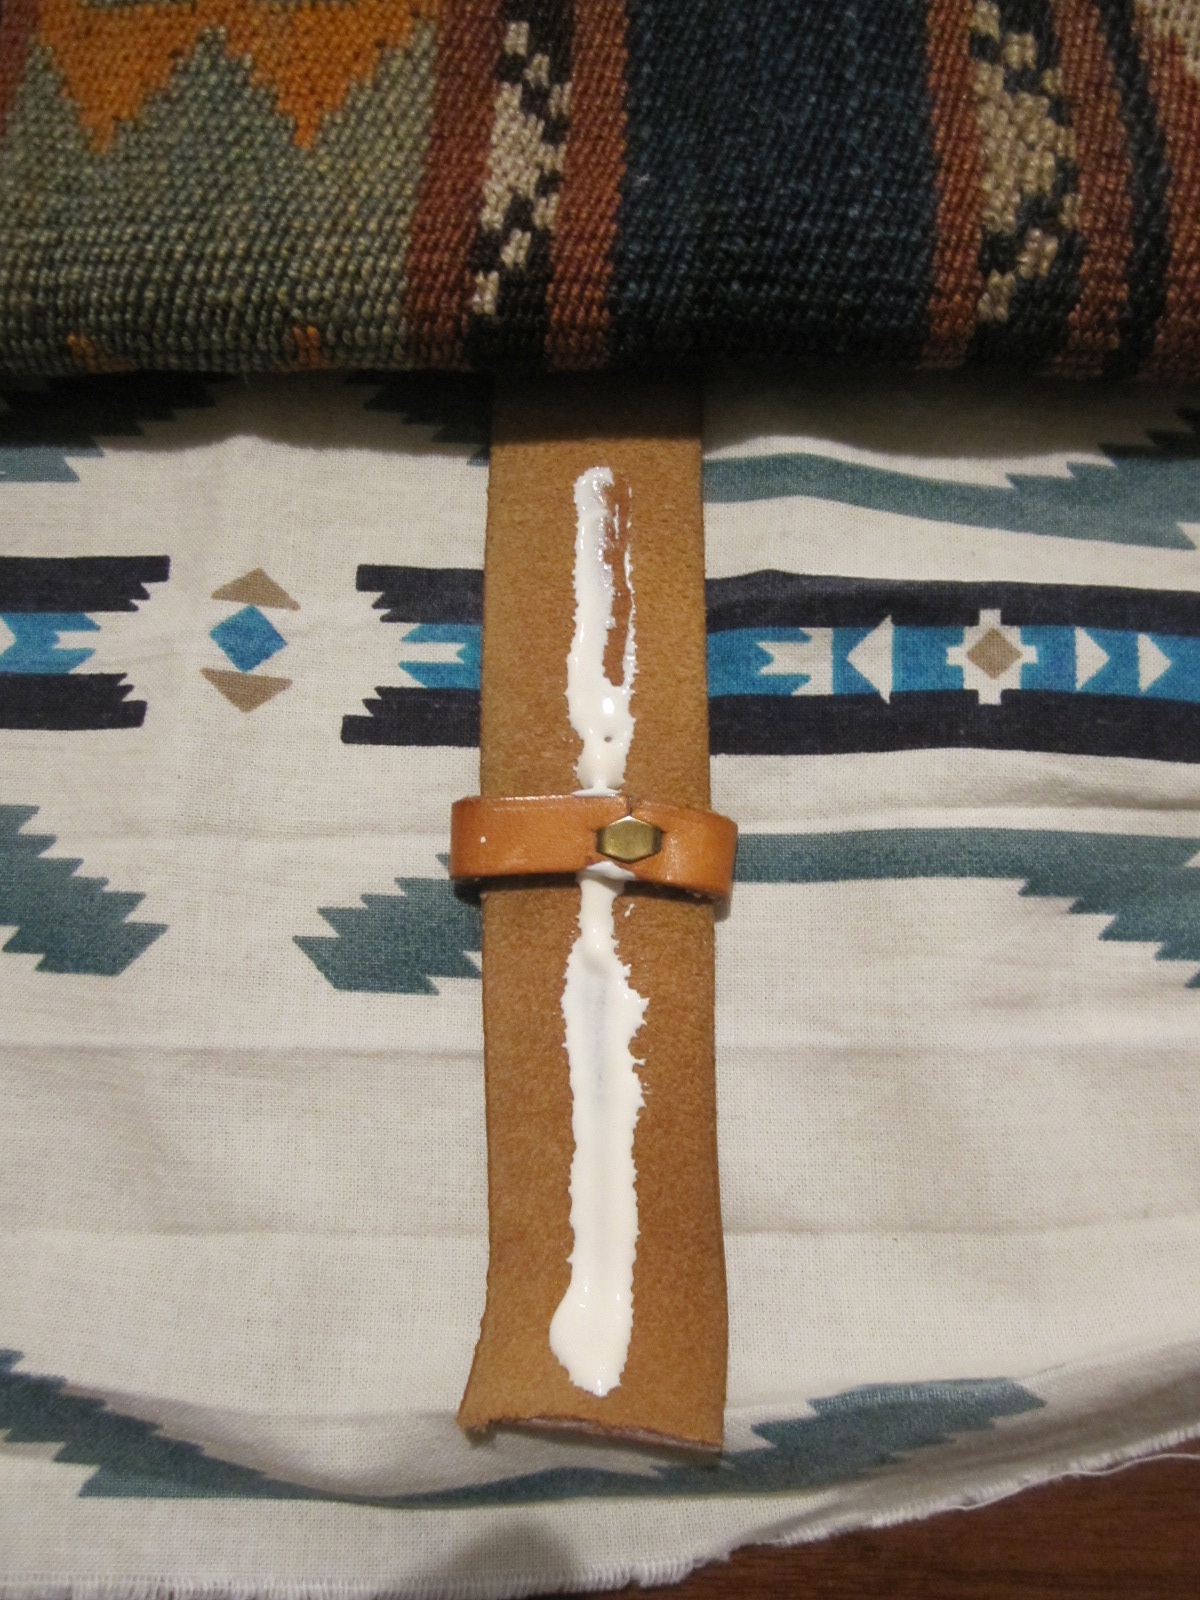
 Glue and pin leather as shown above and below,  leave the last 2 inches of the leather without glue.


Use a sewing pin to poke a hole through the leather and carpet, you may need to work it through a few times to fit the head pin.  Push the head pin through to the inside of the clutch.


Clip off some excess of the head pin leaving about 1 cm sticking out.

With your needle nose pliers turn the rough edge of the pin down to make a small loop.


Xo Austere

Tuesday, 10 July 2012

Lone Ranger


When I saw this lookbook from The Two Bandits on the Spell and Gypsy Collective's blog I nearly had a heart attack. Every single photo is stunning and pretty much perfection. It is rare that I see a collection of photos where I not only want every single item but I want my life to be like every single photo. Oh what I would give to spend my life where layers and layers of amazing jewelry, perfectly tattered clothing, and living in the perfectly little wooden house. A girl can dream.
Hope everyone is having a great week. I'm off for a few days of camping in the hot weather.

Prudence

Photos from The Spell and Gypsy Collective

Friday, 18 May 2012

DIY Envelope Clutch


I have been craving an over sized envelope clutch for quite sometime, so when I found some amazing leather on sale for $5 at my local craft store I knew I needed to make one.

What you will need


  1. One yard of leather or fake leather fabric
  2. A sewing machine fitted with a leather needle
  3. Thread that matches the leather or the color of your choosing if you want statement stitching.
  4. Scissors
  5. A sharpie
  6. A ruler

How To

  1. On the backside of the leather draw the outline of the clutch. The width of the clutch should measure 16 inches across, which will allow the clutch to be 15 inches in width with a half inch hem on each side. The clutch should be 31.5 inches in height which will make the finished clutch be 10.5 inches in height when folded 3 times.
  2. In addition to the drawn outline of the clutch, also measure and draw where you will make your half inch hem along the length of the clutch.  This will help function as a guide to follow while sewing.
     

    3. Cut out the clutch along the lines you have drawn
    4. Fold the clutch inside out one third of the way up.
    5. Pin the fold in the clutch in place

    6. Sew the clutch following the hem lines you drew and then turn clutch right side out. 

    7. Fold the flap of the clutch that you haven't sewn yet along both of the drawn hem lines, pin in place, and sew along the edge. 

    8. Now its time to finish up that one last raw edge of the clutch.  I did a 2 inch hem on the bottom edge but you can really play around with how how big you want the hem to be as it will effect how your finished clutch looks. Once you have decided on where to hem your final edge pin the corners in place and sew along the sides, going right next to the stitching you already have along the sides. 


    9. And thats it! I decided to not use anything as a closure but if you want to make sure that things don't fall out you could use anything from a chic belt to a metal clasp as a closure.  


    Prudence
Related Posts Plugin for WordPress, Blogger...